ASTROPHOTOGRAPHY WITH ALT-AZIMUTH MOUNTS
Learn how to take stunning astrophotos with your alt-az mount
When taking astrophotos with any kind of mount, there are two main ways of doing it. Both principles benefit from the simplicity of the alt-azimuth simple design without the need for polar alignment or levelling.
Taking short-exposure and unguided images.
Taking long-exposure and guided images.
It is extremely easy to get into astrophotography this way. Modern CMOS cameras have a very low readout noise. Therefore using many short sub-exposures works wonders and an increasing number of PC programs easily combine the many sub-exposures into a final great image.
When using the TTS-160 Panther Mount all you have to do is:
Just as easy as visual observations, no polar alignment, no guiding, just point and shoot. This article on telescopemount.org dives into much deeper detail about short-exposure astrophotography with an alt-az mount.


NGC 891 Galaxy, 840 x 10 sec ASI 224MC , TEC 140 f7 refractor. No guide, No de-rotator
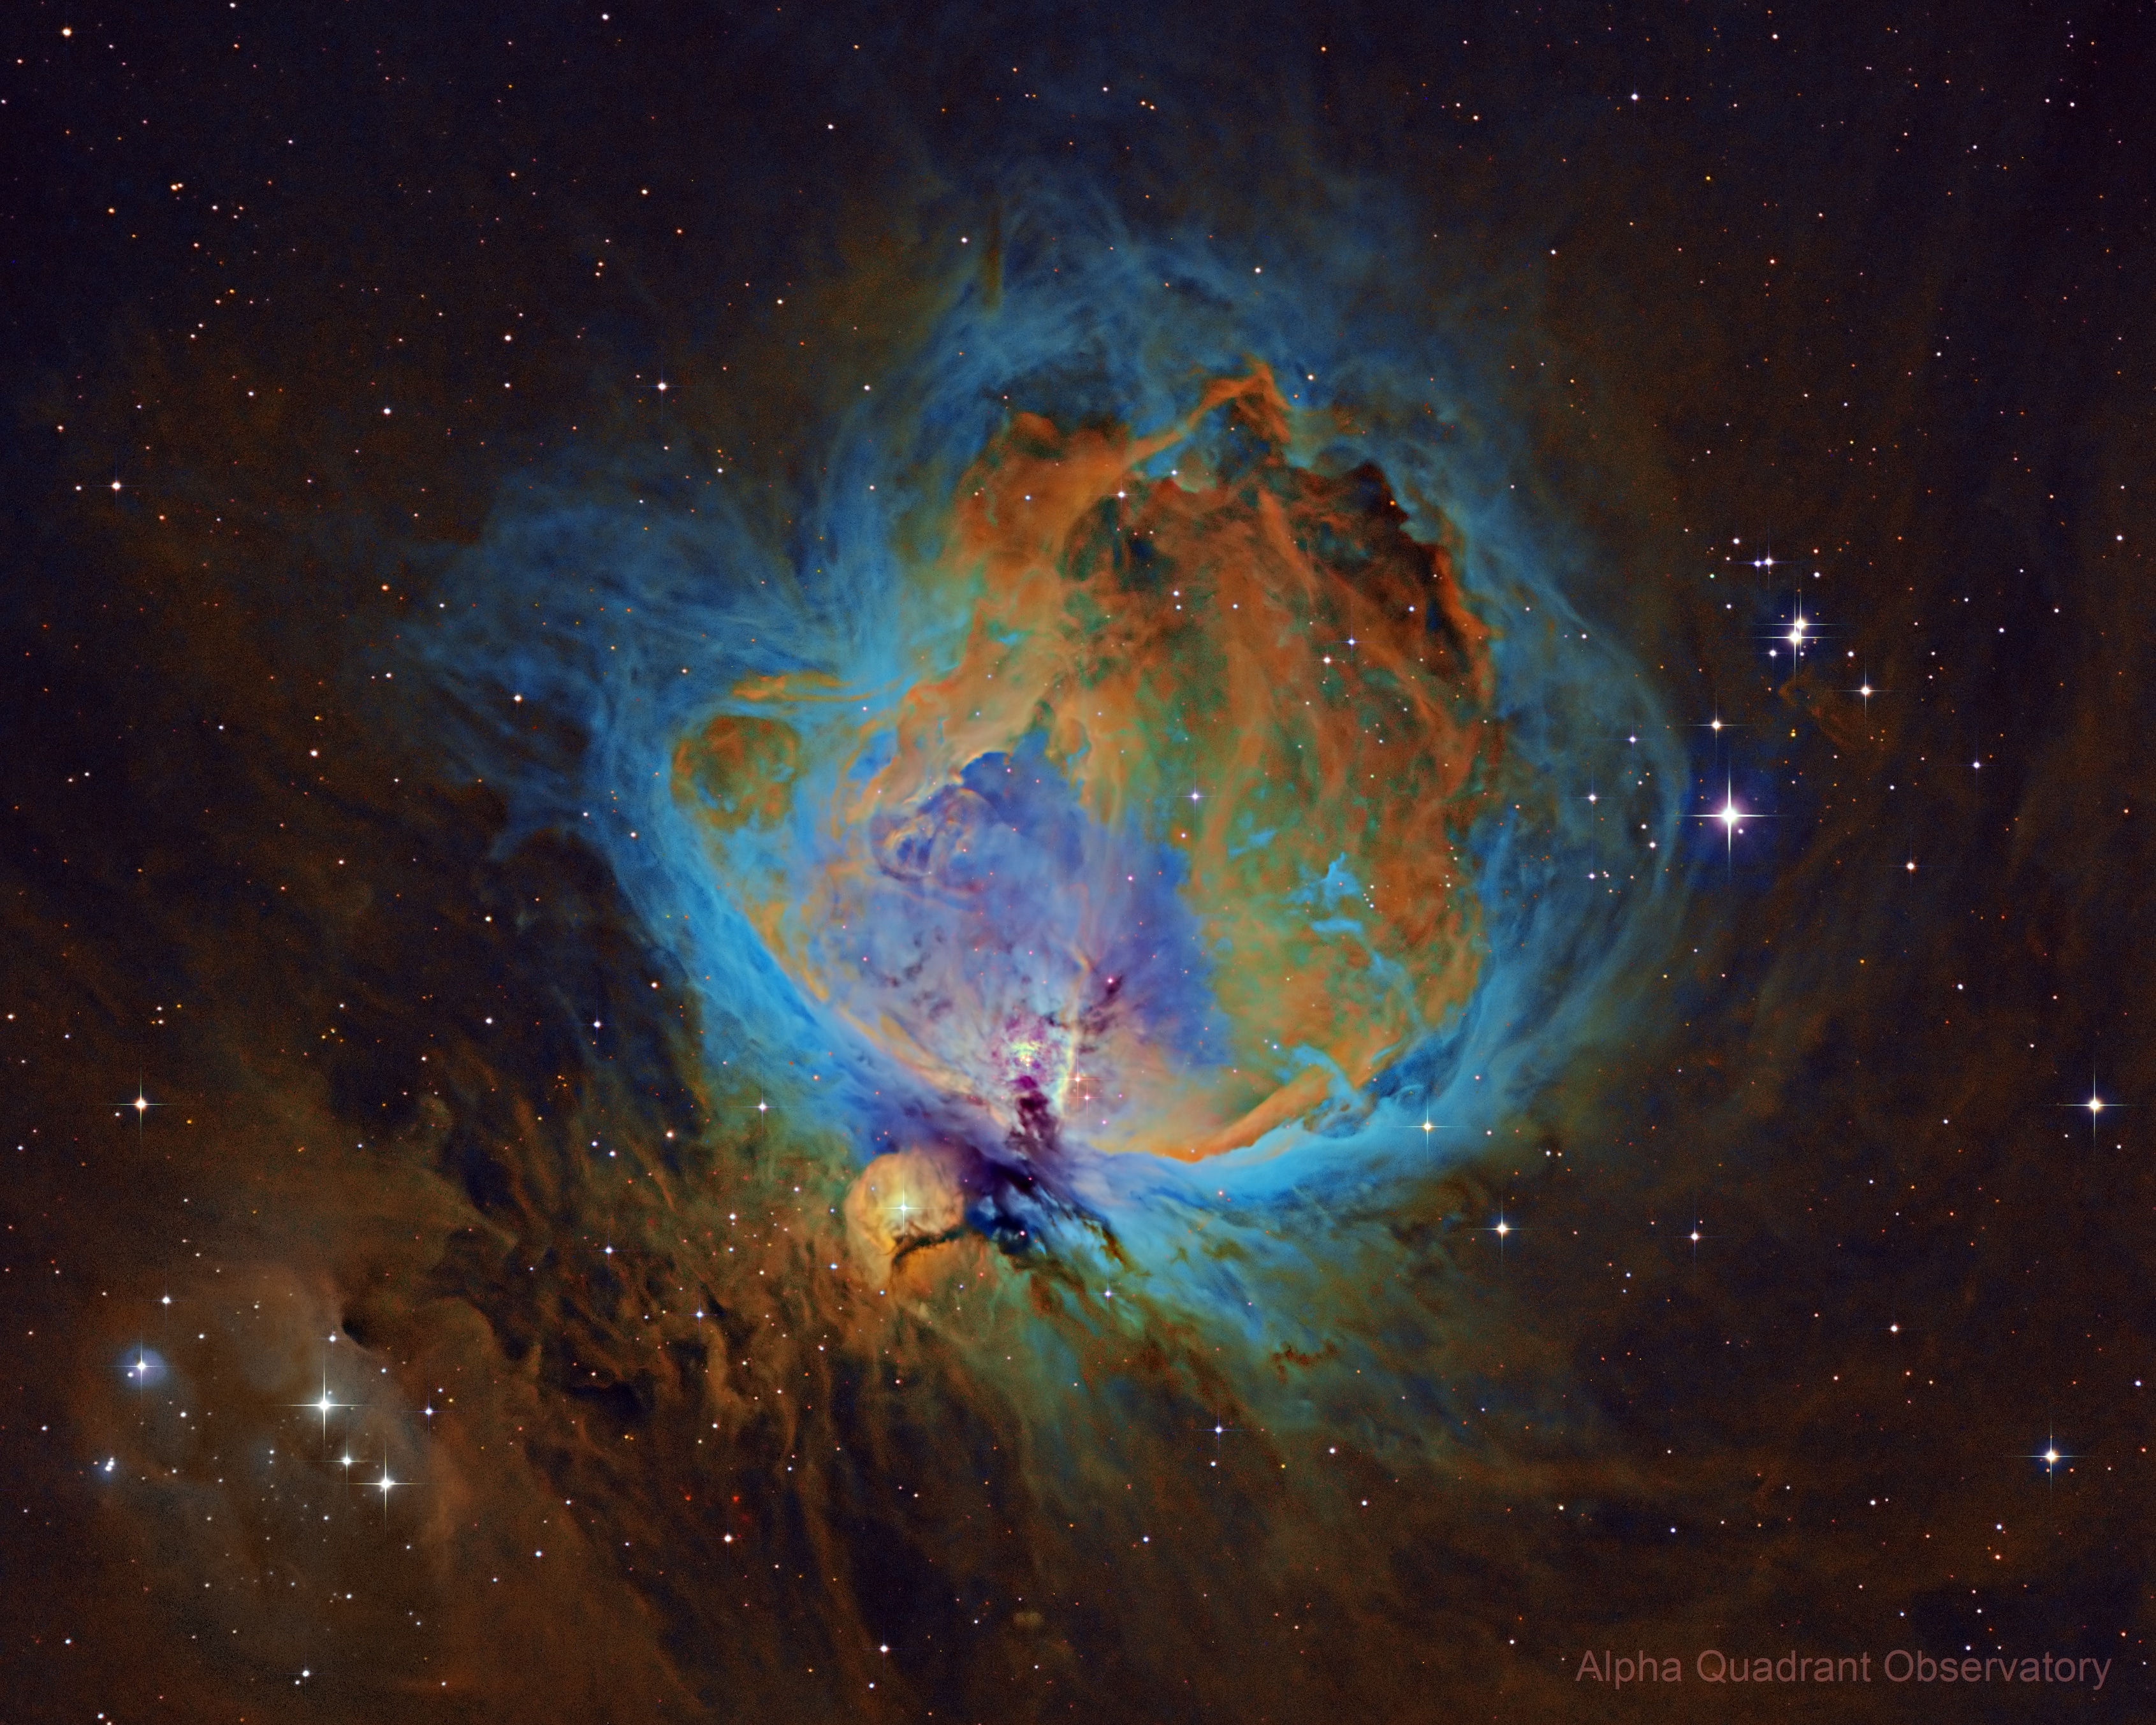
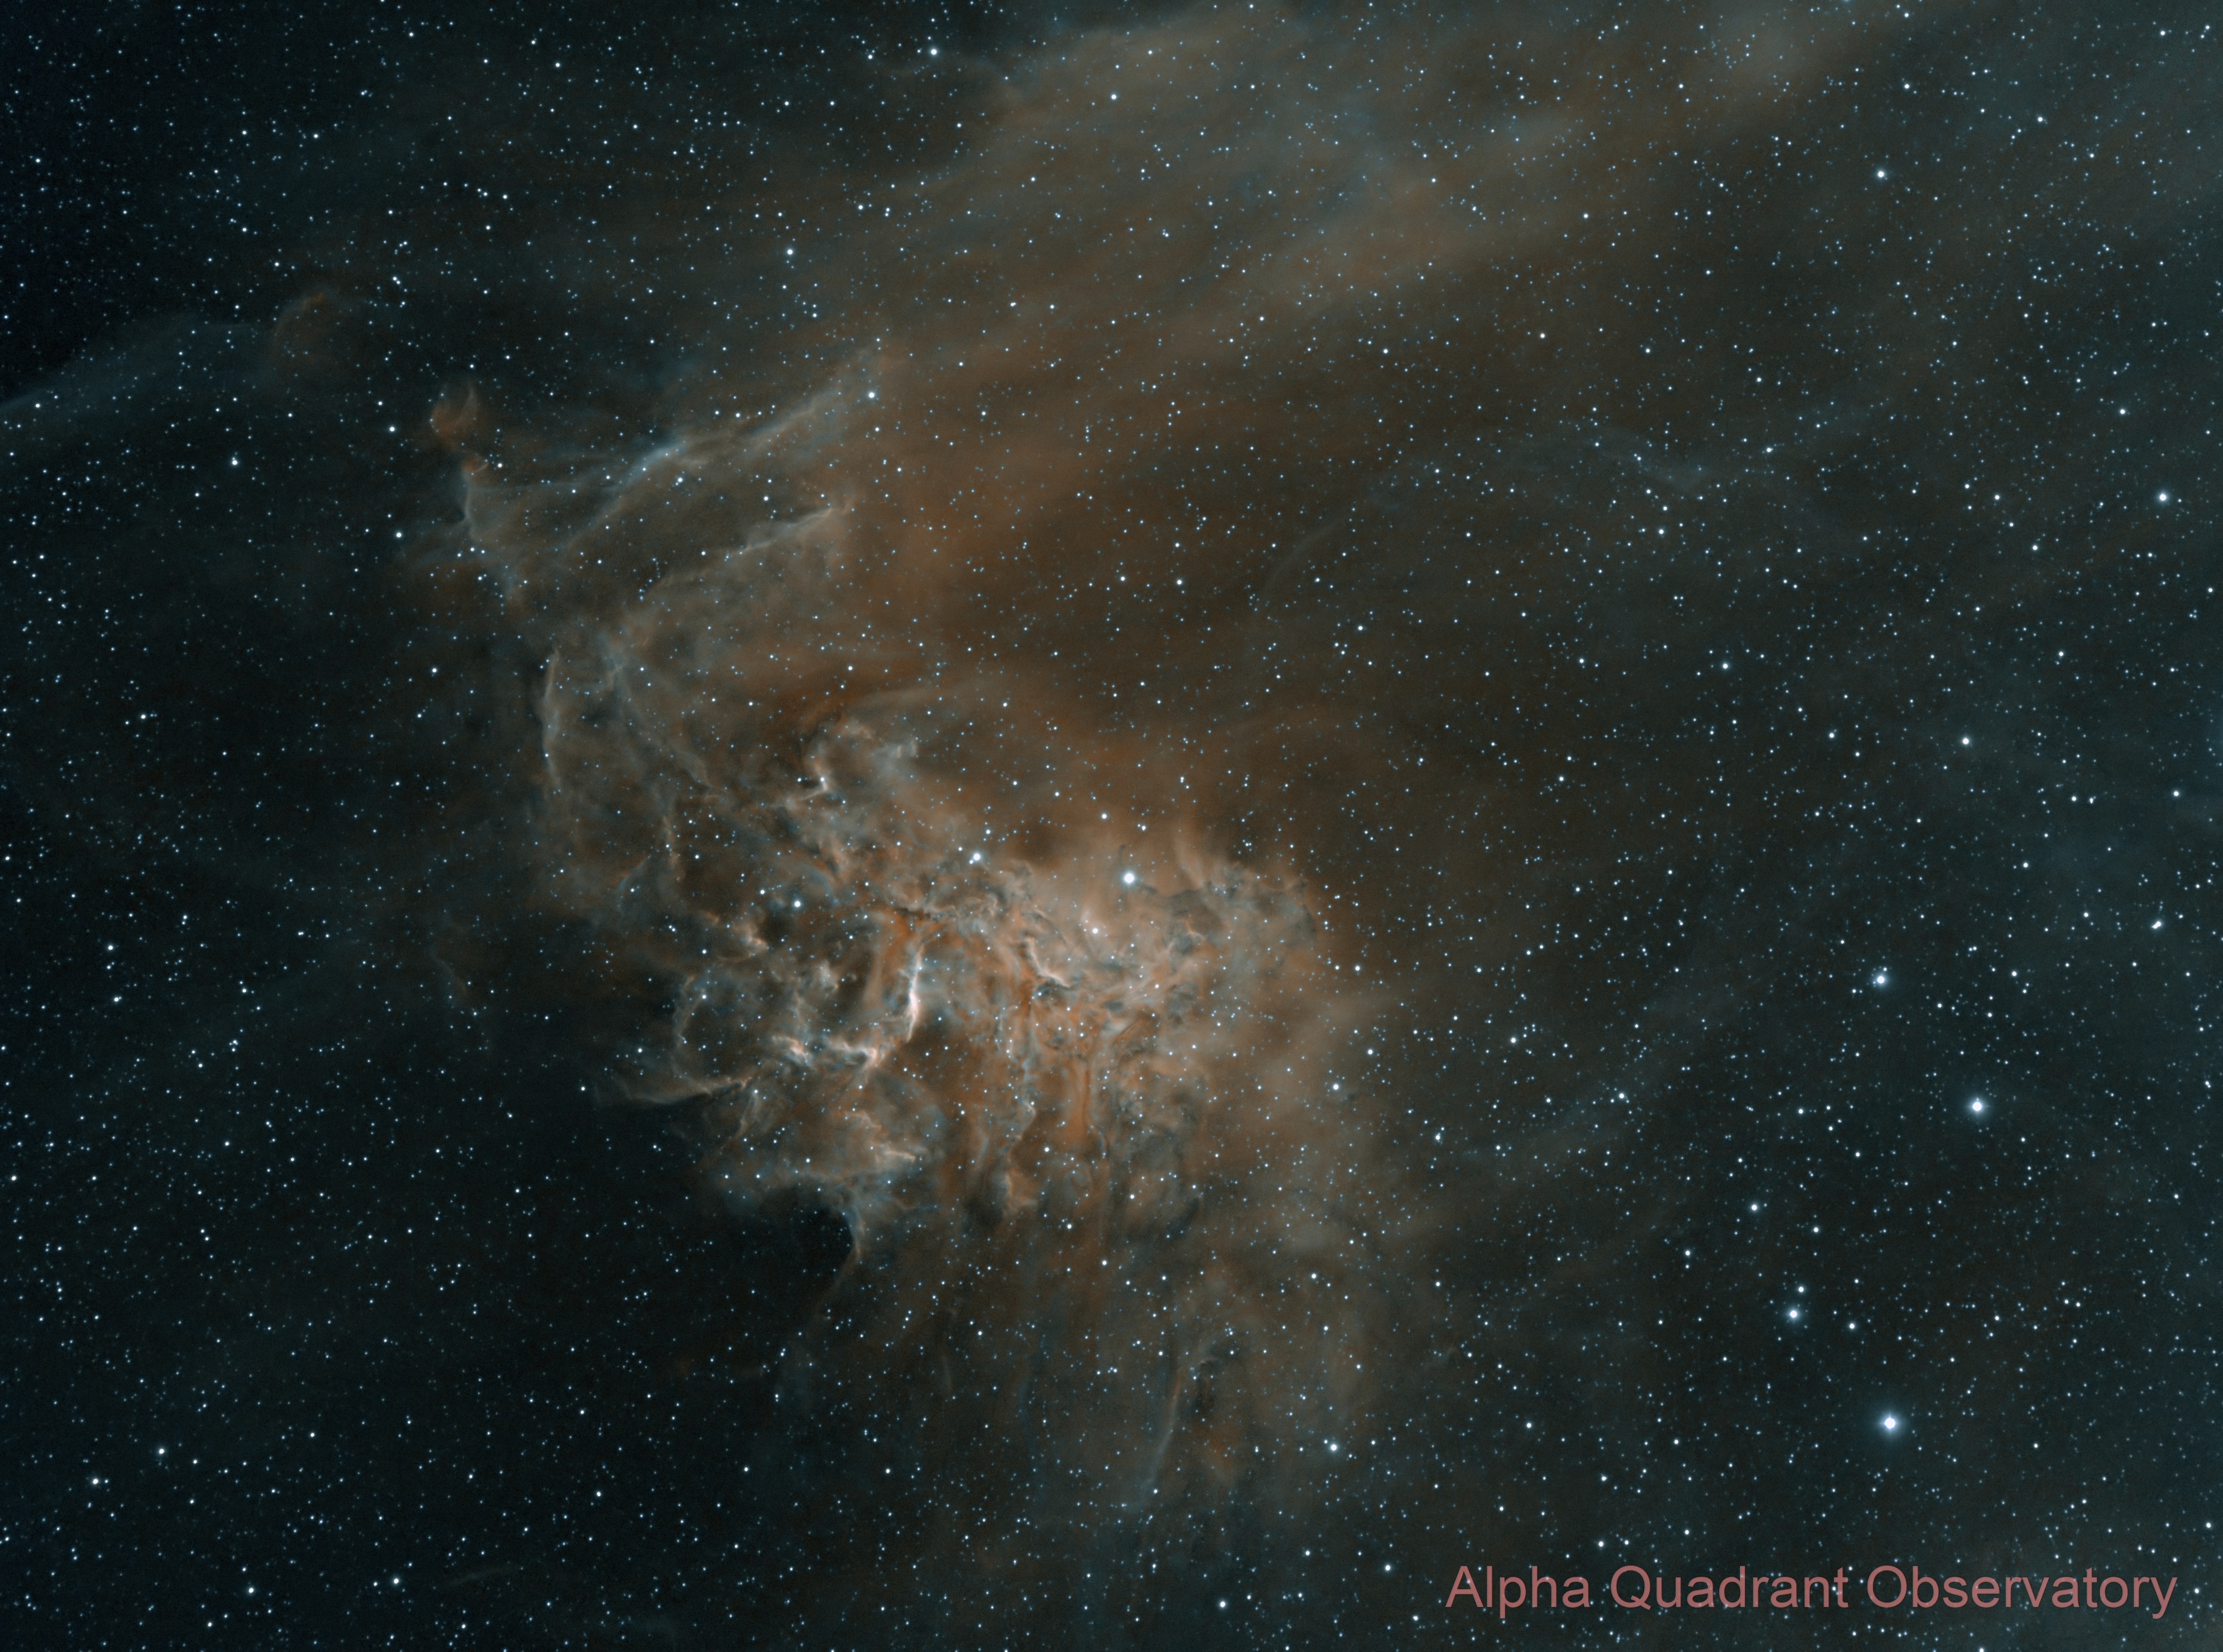
The most amazing deep sky images require long sub-exposures to catch the faintest details. To do this with the TTS-160 Panther Mount you must have the Telescope rOTAtor. This device works as a field de-rotator allowing true equatorial tracking. you achieve the necessary tracking accuracy auto-guiding is used.
When using the TTS-160 Panther Mount all you have to do is:
Easy to transport, fast to set up, no polar alignment, just guide and shoot. For a more detailed article on telescope rotators, go check out this one on telescopemount.org.


Iris Nebula, CelestronC9.25 Hyperstar F/2.2, Camera ZWO ASI071MC, 63 x 120 sec. Panther Mount with telescope rOTAtor
Clear skies – Niels Haagh


![]() Track The Stars is a small Danish telescope mount producer. The telescope mounts are designed and handbuilt in Denmark and made of high-quality materials. The mounts include the TTS-160 Panther Lite Telescope Mount, TTS-160 Panther Original Telescope Mount, and the larger TTS-300 Mammoth Observatory Telescope Mount.
Track The Stars is a small Danish telescope mount producer. The telescope mounts are designed and handbuilt in Denmark and made of high-quality materials. The mounts include the TTS-160 Panther Lite Telescope Mount, TTS-160 Panther Original Telescope Mount, and the larger TTS-300 Mammoth Observatory Telescope Mount.